Creating a personal website is a great way to start promoting your online reputation. Since Google likes brands, this may help your website rank quickly under your personal name, as well as present you as serious and web-savvy.
So you’ve reached the obvious conclusion that you need to start building up a positive professional online presence for yourself. But where do you begin? The answer, in this case, is unequivocal. For personal reputation management, the first step to take is build a personal website bearing your name.
What is it good for?
- Perfect online profile. When someone googles you, the results that come up on the first page are your online profile. You want the top results on that page to be the most relevant and the most flattering to you. A personal website should feature first on the list when searching for your name (or at least in the first three).
- Dynamic mobility. It doesn’t matter if you use the site for presenting your resume, work portfolio, client reviews, or presenting new ventures to potential investors. A website allows you to match content to relevant audiences.
- Stand out. Most people still don’t have their own personal websites. When someone searches for you on Google and finds that you have your own site, it positions you as a professional, and shows innovation and a good grasp of technology.
- Improves your chance of standing out. Your site will come up in search engine results when your name is being searched for, but that’s not all. There’s a good chance that your site will feature in the results for other keywords that feature in the content that you’ve put up.
- New skills. This has less to do with online presence, but going through this process once will show you how simple and easy it is to build a website. This is an important skill to have.
- It’s fun to say “Google me!”, and it’s very effective too.
Setting up a personal blog – The cheap way
You can let blogger.com, wordpress.com or tumblr.com do the work for you. This kind of blog doesn’t require a domain name or a server to host your site. Signing up and starting the blog is really simple. The disadvantage is that the blog doesn’t sit on your domain, instead, it’s on the blogging platform’s domain. This kind of blog is less effective in terms of promoting your site, looks less professional, and also, if you ever decide to move over to a different platform or buy your own domain name, the blog’s address will change. This is obviously better than nothing, but it’s advisable to invest your time (and a bit of money) in building your own web domain.
Setting up a personal blog – The right way
Setting up a personal blog on your own web domain is a fairly simple and inexpensive process:
Step 1 – Buy a domain name:
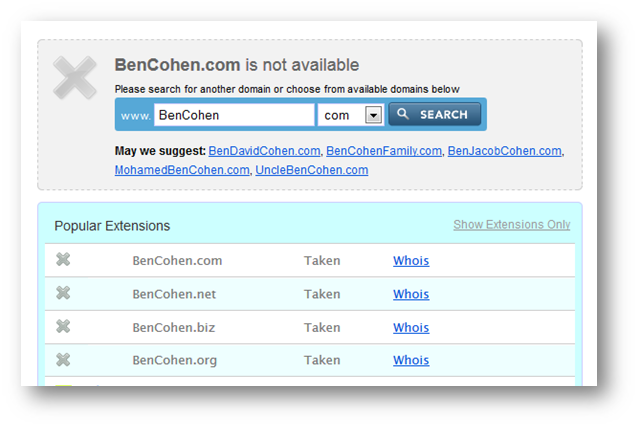
To begin with, buy at least one domain name containing your full name, preferably ending in .com (.net is also OK), if the site is for the international community. If the site is meant to addressing specific country, for the Israeli market for example, you can stick with a second-level ‘.co.il’ domain. Obviously, if you’re looking to attract an international market and your name is Ben Cohen, you’re not going to find a top-level domain name available:
Setting up a personal blog – the right way
Setting up a personal blog on your own web domain is a fairly simple and inexpensive process.
Step 1 – Buy a domain name:
To begin with, buy at least one domain name containing your full name, preferably ending in .com (.net is also ok), if the site is for the international community. If the site is meant to be language-specific, for the Hebrew-speaking market for example, you can stick with a second-level ‘.co.il’ domain. Obviously, if you’re looking to attract an international market and your name is Ben Cohen, you’re not going to find a top-level domain name available:
In this case, you can purchase a domain name that begins with your name, with the addition of another word connected to your main profession. For example, if Bill Johnson is an aspiring author, billjohnsonwriting.com is a great solution.
I buy most of my domains through namecheap.com. It’s easy, fast, and they have great customer service in case you need some help.
Domain name cost: $11/year
Step 2 – Your site needs a place
A website is made up of a large number of files that need to be stored on some server connected to the internet. There are a number of different types of hosting service, but the one that suits almost all sites in the beginning is a shared hosting service. This means that your site will sit on a server that also hosts many other websites as well.
My recommended hosting service is bluehost.com.
Most of the hosting companies give more-or-less the same services, but from my experience, this company has an advantage in that they have good customer service, which is an important factor in choosing a hosting service.
Hosting cost: Starting from $4/month in the first year and rising to $12/month from the second year on.
Step 3 – Link your domain to your hosting
When users type your website address in their browser, they are meant to be redirected to the relevant server in order to upload the site they were looking for. This redirection is done using settings listed in the Name Servers (NS), in the management system of your domain. This is a simple process that takes less than a minute. You can figure out how its done fairly easily, or make use of the customer service of the domain provider.
Step 4 – Install the best content management system – for free
In the past, in order to build a static website, you had to be familiar with HTML, and in order to build a dynamic site that could be managed and regularly updated with fresh content, you would have to develop your own management system or purchase one.
These days it’s much easier. WordPress has a free content management system, and most hosting services allow you to install it for free straight from the control panel of the site. The system allows you to create pages, posts, menus, categories and much more. Everything can be edited simply and with no technical knowledge whatsoever.
Check out how to do this, or ask the hosting company’s customer service to help you out.
Step 5 – Content
It’s important to invest time and thought in the content that you want to present on your site. You shouldn’t build a website in order to have your resume up on the home page. If you’re not so good at writing, try and get help from professional content writers, or companies specializing in this.
The content on your site has to be original. Google really doesn’t like repeated content. Don’t copy text that already exists elsewhere on the internet onto your site (for example, your public Linkedin profile), and don’t copy text from your site elsewhere on the internet.
Conclusion
If you want to create an impressive online presence, a personal website is the right way to get started. If you’re not a technophobe and have some spare time, and want to learn something new, go for it. If not, for a small sum you can easily find one of thousands of companies and individual designers specializing in WordPress, who would be happy to set your site up for you.
This article doesn’t go too deep into the technical side of things. There are many sites and videos available online that delve into the details of how to do each of the stages outlined above. If you still get stuck with a question and need help with the process, we’d be happy to help you out, or to guide you to a relevant source.
Good luck!
Helpful Resources
If you are looking for help, Elance is the place to find someone who can help you:
Recommended domain provider:
Recommended hosting provider:
How to build a wordpress website on less than 4 minutes. Great video by Pat Flynn (one of the best bloggers I know) from smartpassiveincome.com:
[youtube_sc url=”http://youtu.be/wPwQvnar99w” modestbranding=”1″]


